|
Part 3. Office 2010 Program Specifics
By Mel Babb
Word
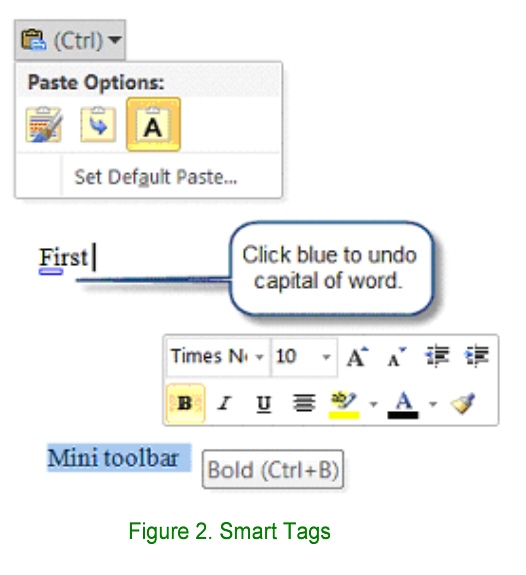
The first letter of a word at the beginning of a line is capitalized. If you point at the word, it shows a tiny blue rectangle under the first letter Figure 2.

Click it and you can undo the capital. Or much easier, after you type the first word, and press spacebar, immediately press Ctrl+Z, which will undo the pesky cap. If you don’t want a cap after a . (period), just press Ctrl+Z to undo it. The Ctrl+Z comes in real handy when you are editing pictures and moving objects around on the screen and get them in the wrong place.
Header and Footer — Get What You Want
Doing something as simple as adding a header or footer has become tricky. Microsoft put together a whole “gallery” of headers and footers, none of which have what I want in a header or footer. If you do many documents with the same kind of header or footer, you can save your creation as a building block with a group name like !Mine – the !(or any character like space) is so the group will appear at the top of the list. Here’s how to create and save my favorite header.
Double-click the header or footer area (top or bottom of document) to activate it.
Choose Insert, Page Number, Top of Page and pick Bold No. 2. Select it and unbold it.
Click at beginning of line, Choose Insert, Quick Parts, Field, Filename. Choose Title case. (If you want the path, check Add path to file name. You may need to put this on the second line of the header if the path is long.) Press End then tab. Type the date in any format you want. (If you want the date to always be the date you open the file, then Choose Insert, Date & Time, pick the format you want and check Update automatically.)
Press Ctrl+A to select everything in the header or footer
Click Insert, Header or Footer on the ribbon
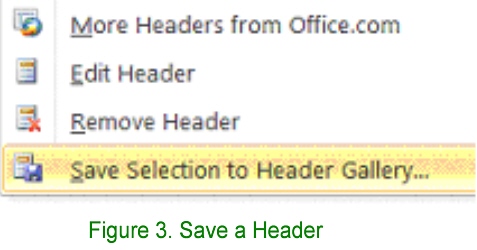
Choose Save Selection to Header or footer Gallery, Figure 3

Type a name for the Header
Change Category to “!Mine”. The first time, create the category.
Save Selection to Header Gallery.
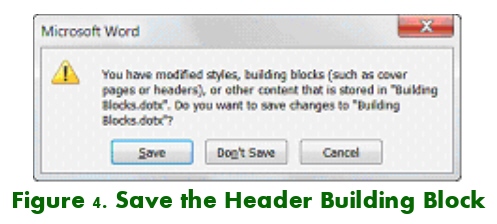
When you close Word, choose yes to save the header building block, Figure 4

Excel
Excel has lots of new and changed things. There’s a new chart engine. If you made lots of charts before, you will find this not so handy. If you are new to charting, you’ll probably like it. It has lots of new graphics for making snazzy looking graphs. The new table feature makes the data in the grid do several things almost automatically. Select any cell in your data, Click Insert, Table. It turns on the filter so you can see just what you want of the data. It bands every other row a different color for ease of reading across a row. If you add rows of data, it updates the range of the table. The filtering and range are automatically reflected in any charts you have made. Other features allow you to now easily find and remove duplicate rows or use conditional formatting (new rules) to compare two lists of names and locate the duplicates.
PowerPoint
PowerPoint has lots of new features including being able to see two shows side by side, using reading view. You can now create a video of your show or broadcast your show, so people without PowerPoint can see it. Go to File, Save and Send, choose Create a Video or Broadcast and select your settings. If you get fancy with your animation settings, you can use the Animation painter (on Animation tab) to copy them to another slide, like Format painter. Although it’s easy to pick a design for your show, knowing what design and colors you are using is a mystery to me. I can see them and change them, but I don’t know what I’m using by name easily. I have not mastered using them yet, but do know that each design comes with its corresponding set of colors. You can change these. You can play around with the program and get it to do what you want, but may not be able to explain what you did to anyone else. So have at it.
Outlook
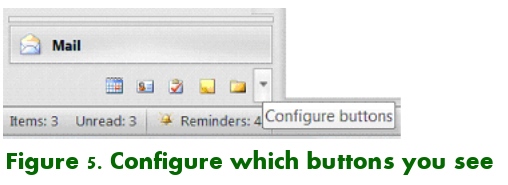
Outlook needs to be customized to suit you. It opens with lots of panes open. I close or minimize them. Click View, to turn off or move the reading pane. On right side click the arrow on the ToDo pane to minimize it (or turn it off on View tab). On the left side, point above Mail and drag the navigation buttons (mail, calendar, etc.) down so only the icons show. Click the configure buttons arrow and remove the icons you don’t use (or understand), Figure 5.

Your Outlook Data File now has a capacity of 20 GB, up from 2GB in 2003 and before. If you use the reading pane, you can now right click on a sender’s name and add them to your contacts. To turn on the BCC (blind carbon copy) line of a message, so you can send an email to many without the others seeing it, Click Options tab, and BCC. If you receive mail from more than one email account like two profiles or identities, you can specify which account you want to send an email from in the From line of the message. To get to the account setup (which used to be Tools, Accounts) click File, Info, Account settings and then click on the drop down Account settings. By the way, if you want to search in a message, Press F4. (Outlook is the only Office program where Ctrl+F forwards a new message instead of opening the Find box.)
Visit the “manual” now called Help for a look at other features in the programs. Click the blue help question(?) hidden on the far top right of the screen under the red X close button and wait for it to open. Browse a topic of your choice. If you are brand new to the program, look for the topic for new users. If you’ve used an earlier version, look at the getting started with 2010 topic. For more info, updates, etc. just surf to www.microsoft.com and click on your area of need.
‘Till next time. Happy Computing.
Mel Babb, a long time member of HAL-PC, is currently on the volunteer help committee at HAL-PC. She operates her own company, PC Tutoring Services. She comes to your home and creates notes for you on what you want to learn. See her website www.melpchelp.com and/or contact her at mel@melpchelp.com. Mel Babb © 2010
|

