Capture
a Memory: Video Capture & Editing
by the Reviews Team
Preface.
With the rapid intro of digicams and DVD burners and equally rapid price drops,
I thought it was time to take the next step. Capture your old movies and VHS
tapes, do some editing and burn to either a CD or DVD. For more than the basic
conversion (capture) and burn, you will need to read the manual. Read it not
because it is so complicated, but all three products reviewed this month have
a ton of options and features - no much different from your word processor.
Moreover, once you get the hang of your program, you find it about as addictive
as anything on your computer. Just plain fun!
However, there are three things to consider: a fairly powerful computer, commitment
to read the manual and actually updating your computer - capture software updates
are just the start. Not a real chore, but necessary.
Watch the HALNet homepage for a basic video edit class that will be offered
this summer - a good time to be inside!
Enjoy. Charles W. Evans, Reviews Editor
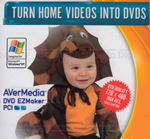 AVerMedia DVD EZMaker PCI: An analog capture
card!, by Robert Du Vernay AVerMedia DVD EZMaker PCI: An analog capture
card!, by Robert Du Vernay
It took less than an hour to install, setup, and actually capture and burn
a VHS tape segment to a DVD, which played on my DVD player. Impressed, yes!
OK, so the segment was only five minutes long, but it worked! I had a problem
during installation when it hung because it couldn’t find a main CAB
file on the CD. Copying the CD to the desktop and running the install from
there resolved the problem.
The AVerMedia DVD EZMaker PCI, gives you
a choice of component video or S-Video IN. Component video, we all known as
the RCA type jack; S-Video is the new, round analog plug from your DV camcorder
or DVD player. Conversion to MPEG1 or MPEG2 type file is done in real time
via the PCI, converter card.
To controle the AVerMedia PCI card operations, use the neoDVDstandard v4.5
software, which breaks into three functional areas, plus a button for SHOP
(upgrade v5.0 is available).
The CAPTURE screen is where you ID the inputs you have…the AVerMedia
PCI input VHS or a DVD player or a DV camcorder, or perhaps you also have a
TV card…(cable) and what channel? AUDIO? You want to pump it up; you
can.
You must declare what the output signal format will be at this point.
Will the output be NTSC or PAL? There is a drop down listing of countries and
TV designations. Until now I didn’t know Hawaii was another country.
You can set a TIMER to limit the capture. You can also stop/start manually.
Note, the available TIME – Storage indicator is provided below the timer
(max possible capture). WHERE to put the captured FILE and its name; make a
note of this or put it on the desktop so you can find it later. You also have
to choose the type of file to be created, MPEG1 or MPEG2. If you want a DVD,
choose MPEG2; for VCD uses the MPEG1 format.
OPTIONS button on the lower left, if you are brave; you can COPY on the FLY
directly to a DVD (you remember those rewrite DVDs the RW types). TUTORIAL
button is available on every menu. I recommend you use it to review the
many options on the screen before you press CAPTURE.
After you have setup all the options and are ready to do it, turn on the VHS,
TV, DVD or DV and then press the Capture button, and viola!
The CREATE menu is next; it can guide you with a Wizard. This screen is basically
a MENU for the DVD setup/edit/burn. Read the tutorials. Lots of buttons! The
OPTIONs button sets up the preliminary screen defaults / items. On the right
you can select backgrounds, colors, styles. You must also identify the INPUTs
and declare the type of OUTPUT you desire. This software, conceptualizes in
terms of projects.
The EDIT button is at the bottom; once you have put together all the pretties,
you need to deal with the issues of editing the video stream. There are several
options. After you are finished editing and you have declared the type of output,
you get to the MAKE DISC button, which will begin the necessary processes to
burn a DVD or VCD.
COPY is the third screen and its functionality is obvious. Please read
the TUTORIAL and caveats.
When you get into the DVD arena, you are going to discover it is in a state
of flux. Standards are still in competition; the media is expensive and not
uniform and the same can be said for the DVD players and DVD burners. With
all that being said, I must admit, that I do like this AVerMedia EZMaker PCI
analog card ($39). I didn’t get the greatest video out, but considering
all the variables, it worked. It worked as advertised and should be seriously
considered by the less experienced. For more info and updates go to www.avermedia.com.
Robert Du Vernay is a HAL-PC member and chief instructor for CD Burning for Everyone and the DVD Burning for Everyone classes. He can be reached at rpd@hal-pc.org.
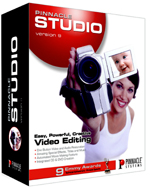 Pinnacle Studio 9 AV/DV, by Jannice
D. Morris Pinnacle Studio 9 AV/DV, by Jannice
D. Morris
Simple, Powerful, Creative. Use Studio 9’s intuitive,
three-step movie making, user friendly interface to capture, edit, create and
then burn CDs or DVDs. The box includes a full version of Pinnacle
Studio 9 AV/DV Deluxe, a well-designed break-out box with a 5’ cable,
and a PCI card with two FireWire ports. You’ll not need any other devices
to capture video. Just install the PCI card, hook up the cable with the breakout
box at the end, attached a VCR or camcorder, press PLAY and RECORD. That’s
it. When it’s over you have “captured” your video and ready
to edit and burn it.
Drag-and-drop your captured video footage and edit using either the
timeline or storyline approach and assemble a movie in minutes. Other features
include the ability to import CD, MP3 and WAV audio files into your timeline/storyline,
and export still frames that can be printed out on a color printer. Capture,
edit and output 16 x 9 widescreen video, and create surround sound soundtracks.
Looking for a quick way to turn your recent vacation video into an enjoyable
movie? Let SmartMovie edit your movie for you! With Studio’s
automated editor, you simply choose a video and song from your hard drive and
select an editing style (I would use this “automatic” approach
for simpler, less sophisticated movies - too many cuts for more sophisticated
movie moguls.) Studio creates a movie - complete with titles, transitions,
and special effects. CAUTION: Read the manual first. I tried to create a fancy
title and somehow I overlaid the first part of my video with it. Always make
a backup copy!
Studio 9 gives you every tool you need to easily capture video to your
computer, edit it, add titles, music, narration and special effects and then
output a finished movie back to videotape, DVD and the web. New advanced features
for Studio 9 solutions include automatic editing capabilities and powerful
one touch controls for improving old or damaged video. And support for third
party developers to incorporate their audio and video plug-ins.
Some of the more interesting new tools:
- Fix poorly shot movie footage
- Image Stabilization - fix those shaky handheld shots
- Analog tape cleaning - restore old videotapes
Video Inputs: composite video, S-Video, IEEE 1394 (FireWire/DV)
Video Outputs: ditto
When you’re done with your movie, output your creation to the
format of your choice. Studio lets you export you movie back to analog or digital
videotape, VCD, S-VCD, DVD and the Internet.
Surround-sound gives users an intuitive control to place, or move,
the movie’s audio elements within the surround sound space, creating
scenes with more dramatic audio impact. And for the first time for consumers,
they who shoot video in wide-screen (16 x 9) can edit and export their movies
for wide-screen playback.
Features like real-time effects, rendering speed, DVD authoring and productivity
tools are what separate one solution from the other. One of the best features
is that all the software is in one package - no need to learn several different
packages - that I especially appreciate!
There are some glitches. When I moved from Edit and selected Capture, the
program froze. When you select the Capture option and press Record, you are
presented with a small menu requesting a file name. That is backwards and makes
it awkward to coordinate VCR Play with Record. There are a few more glitches
which I expect to be resolved in update “9.1”. Most of the effects
are attractive, but won’t rattle your cage…useful, but not creative.
Also, there is no support for DivX. Studio 9 AV/DV Deluxe is an excellent solution
for most home or small office requirements. It is affordable, powerful and
especially easy to use. An excellent buy. For more info and updates (there
are two), go to www.pinnaclesys.com.
Jannice D. Morris is a HAL-PC member who is a staff archivist
for a graphic conversion firm.
NOTE: I am preparing a more comprehensive review of just the Studio 9 software
for the May issue.
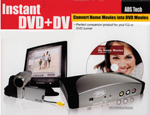 ADS Instant DVD + DV USB 2, by Harold G. Spangler ADS Instant DVD + DV USB 2, by Harold G. Spangler
Instant DVD + DV is an external USB2
device that provides simple steps to get started capturing and publishing your
video. You can even capture straight to disk in one simple step, yet it also
includes a helpful range of video editing and DVD authoring tools. You can
quickly obtain high quality real time MPEG2 video
capture from DV camcorders, analog camcorders and VCRs (at up to 15Mbit/sec
through a USB 2.0 port). This means you can transfer either 8mm or VHS, including
Hi8mm and S-VHS. Instant DVD+DV supports both NTSC and PAL video formats. The
bundled software is to edit your video and add effects and titles as well as
music and soundtracks and burn a disk.
Within 10 minutes of loading the installation CD, I was capturing a VHS tape.
StudioVido 7SE is bundled with this unit and I will only review it in general,
since a more comprehensive review of the full version 7 will be in the May
issue. The unit ships with capture software called CapWiz 3.0 (download and
install CapWiz 3.0.5). Both VideoStudio and Movie Factory 2, can capture MPEG.
Instant DVD+DV converts your video to MPEG-2 “on-the-fly” (as
you capture)! First thing you notice is that it is simple to set-up to your
specification and easy use. CapWiz has a no-nonsense capture- config screen.
And when you hit the RECORD button, it begins immediately - no annoying delays!
Capture Wizard
Capwiz is easy to set up. It captures the standard sources: VCD, SVCD and
DVD. Obviously, if your ultimate goal is a DVD or whatever, you’ll need
a DVD or whatever burner. For a more creative “ canves” or more
sophisticated results, use Ulead’s VideoStudio 7SE.
For a bit more polish to your final movie, just grab
your video from any video source and use VideoStudio 7 as your editor.
Now comes the fun part…editing. Yes, it has a fair size learning curve,
but the included manual takes a functional approach with lots of pictures to
assist you. Trim and organize your video clips, then add a soundtrack and voice-over
narration. Include titles and add special effects using 42 different transitions,
umpteen title effects and 17 video filters, most of which are remarkable, but
ordinary.
One of the more convenient features is the dozens of different, pre-defined “templates”.
Create your own unique DVD videos with any of the DVD templates, complete with
intros, chapters, and interactive menus...or customize your own template, as
I did. For example, add special text and music.. To start, I’d suggest
you use the default settings and read the useful Manual.
My test capture was a 110-minute VHS tape of a TV program. I made a custom
DVD template (720x480) with 6.0Mbps and 192kbps audio. That setting was very
good for picture quality and able to fit on a DVD blank. Complaints about VBR
size of initial capture are ridiculous.
Default filtering does a great job of cleaning up VHS tapes. Initially, there
was some brightness flicker, but it disappeared when I updated the Capwiz.
If you are looking for an easy way to get video from your DV camcorder onto
a CD or DVD, this is it. The breakout box hooks up to your computer via a USB2
port and includes a FireWire port to control your DV source. The manual
is helpful and well illustrated. Please read it! My only criticism is that
there are three video packages to learn. You may not need all three, but you
won’t know until you use them. The video quality is excellent. I give
this unit and software two thumbs up for the beginner to intermediate user.
For more info go to www.ulead.com.
Harold G. Spangler is a HAL-PC member, NASA senior software
consultantr and video converter. He can be reached at hgsbu54@hal-pc.org.
Editor: Look for a more extensive review of Ulead’s
VideoStudio 7 (full version).
|